If you have made any or all of these settings (below) in the test options for a test, quiz or exam, you may also make exceptions to those settings:
- Number of attempts
- Timer
- Availability: Date and time the test is available to the student or group
- Force completion
- Restrict location
You can make exceptions for individual students or for groups.
There are occasions when you will need to have test options be different for some students.
Two common instances that arise here at SHSU Online are:
I. Making the test available at a different time for a student who has a legitimate or otherwise acceptable schedule conflict. This could be because of planned event or an unforeseen absence for which you wish allow an extension or different availability window.
II. Students with a documented disability needs either 1.5 or 2 time increase in time to take the test.
The first step for creating an exception to a setting is to add a user under TEST AVAILABILITY EXCEPTIONS.
- Navigate to where the test is deployed in the course.
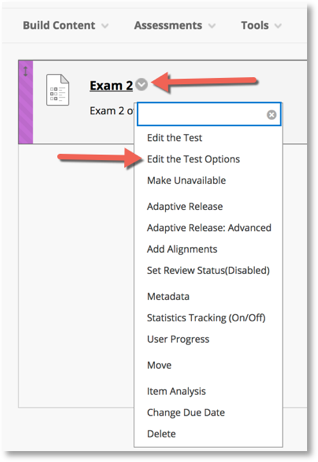
- After hovering your mouse over the test, access the test’s action menu (click the gray icon to the right of the test name.
- Choose “Edit the Test Options” from the menu.
4. The Test Options Page will open.
5. Scroll down to the third section titled “TEST AVAILABILITY EXCEPTIONS.” Please note that there are brief instructions listed there.
6. Click the button labeled “Add User or Group.”
7. A pop window will appear that contains all of the students and groups in the course. Select one or more from the list and click submit.
8. You will be returned to the Test Options page, and you will now see rows in the TEST AVAILABILITY EXCEPTIONS for each student and/or group that you selected.
(REMEMBER: These are exceptions to the availability option settings. If you have not made the settings, you cannot make an exception.)
I. To make exceptions for student availability dates and times, you will need to click the small calendar that is below the AVAILABILITY column head.
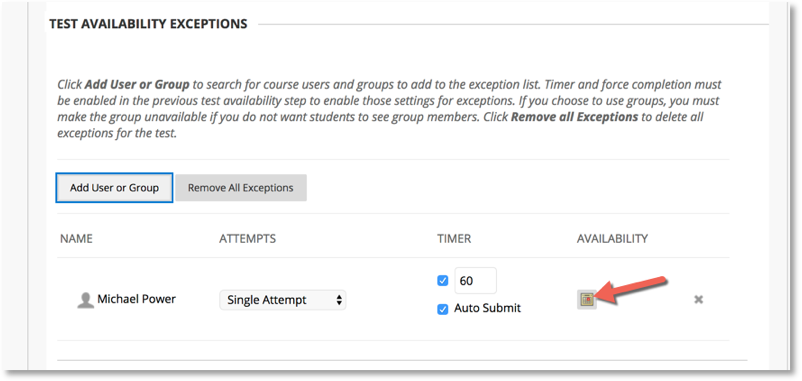
A small pop-up window will appear with date and time controls for availability to see, open and begin the exam.
- You can set an earlier start date and time with the “After:” settings or an extension with the “Until:” settings.
- Or you can also provide a completely separate window for the student or group to have access, by setting both.
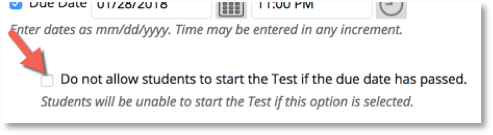
PLEASE NOTE: if you have clicked the box under DUE DATE that prevents beginning the test after the due date, the student will receive an error message when attempting to begin after that date. Remember to uncheck that box, if you are allowing access after the due date.
II. To make exceptions for time allowed to take an exam, there is a little more detailed process that will make repeating the process much easier in subsequent terms.
If you need to set exceptions for a student who needs additional time for tests that have a time limit set with the “Set Timer” settings under Test Options (in the TEST AVAILABILITY section), visiting every test (quiz or exam) that has the time limitations will be necessary.
When you course copy your course content to a future term, these settings, since they are assigned to individual students, will not copy. So, to avoid having to repeat the tedious process each time a student needs this accommodation, you can utilize Groups to eliminate the repetitions of the setting up each test for each student for each semester!
It requires a setup of two Groups – one for each of the two possible time-extension accommodations. These are one-and-half time (1.5X); and two-time (2X) accommodations for taking timed tests and assignments.
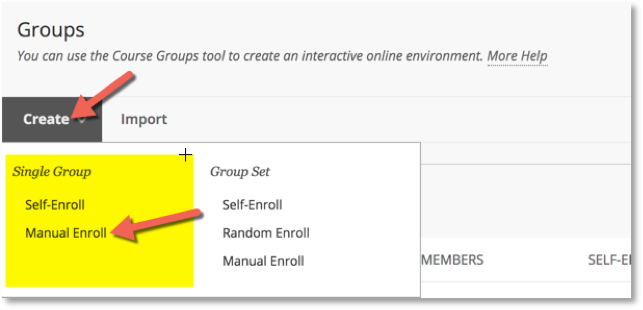
In the course management portion of your navigation menu, click to expand Users & Groups and then click Groups.
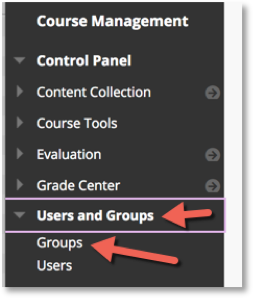
In this newly opened Groups page, you will create two new groups by hovering over “Create” clicking “Manual Enroll” under Single Group.
A new “Create Group” page appears. Here you will give the group a name.
Names should identify the accommodation appropriately. I use “SWD 1.5X” and “SWD 2X.” Try to be consistent.
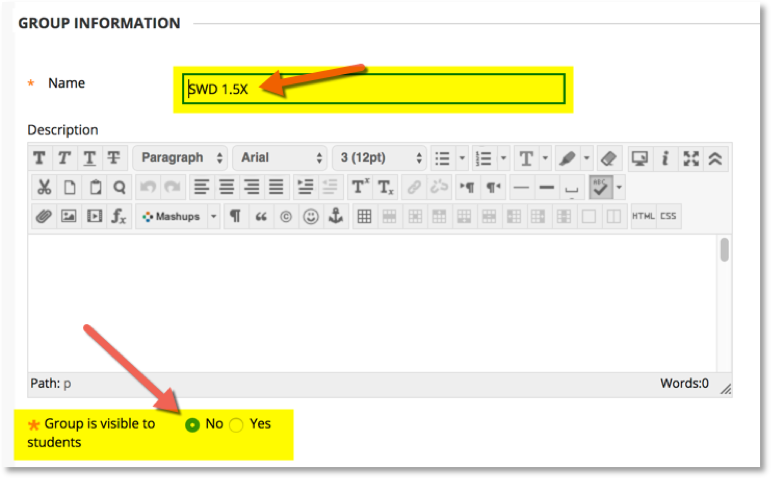
IMPORTANT: Change the “Group is visible to students” to “No.”
During this first time to set this up, you can add the student who needs the accommodation to the appropriate group.
Scroll down the Create Group page to the MEMBERSHIP section to Add Users. Click the button and select users to add. Click Submit.
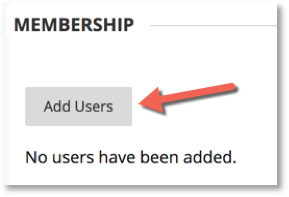
NOTE: There is another Submit button on the Create Group page. Do not forget to click that one, too.
After creating these two Groups, you are ready to add Timer Exceptions for each test. You will be adding both Groups (1.5x and 2x), and setting the Timer exceptions for each at the same time – in a way, another time-saver.
Repeat the first steps, mentioned above (Add User or Group), as part of the Availability Exceptions, choosing the two Groups that you have created, instead of individual students.
Now, set the Timer for these two rows to be 2-times and 1.5-times the original timer settings.
(Repeat for each test.)
Now after a course copy and future accommodation needs, all you need to do is add the user name to the group under Groups to include the student with the appropriate accommodation.
That is a future time saver!
PLEASE NOTE: This article is also available as a PDF document, for handy reference.